


I (think!) its done...
Art is never finished, only abandoned

“A painting is never finished, only abandoned” Leonardo da Vinci
I am really lucky as an art quilter. Unlike an artist working on a stretched canvas, in watercolor, ceramics, printing making, or sculpture; I can make big changes using paint and a rotary cutter.
Sometimes I abandon a piece, bind it and hang it in the closet for a few months knowing it’s not really “finished”. When I take it out of storage I see my work from a new perspective enabling me to identify compositional problems and work on a solution. I begin with cropping.
Cropping involves selecting a portion of the original image and trimming away the rest. Most people know this process from using the photo editing software on their cell phone. Cropping can help correct framing mistakes made during shooting, straighten a horizon, or shift the emphasis to the subject’s face or a key detail. It’s used to improve composition by changing the balance, shifting the center of interest, or reducing negative space. Ultimately, it’s a creative decision that has a major impact.
By using my camera’s phone, it’s pretty easy to play with cropping before taking out my rotary cutter. Simple edits on my iPhone help me test possibile changes. Will the composition work best as a rectangle or a square? Proportion settings that use a fixed ratios (3:4, 3:2, social media formats) can be helpful. Often I use more of a free form approach which allows me to play with cropping different portions on all four sides before actually making a permanent change.
I made a piece several months ago called “Heat Wave”. I really struggled with that piece. It was too yellow. The background wasn’t right, but because I am compulsive about having to finish my art quilts before I start something new, I bound the quilt, photographed it and stored it away. When I took it out of the closet months later I was determined to finally finish “Heat Wave”.
As a retired art teacher I spent a career helping students improve their artwork. In my classroom there was always a still life set up somewhere for students to draw. This classic exercise is used to test how well the artist understands how to use the prnciples of design. Students made common compositional mistakes like placing to focal point too close to the center, having a background that is too large, or creating a symmetrical arrangement of objects.
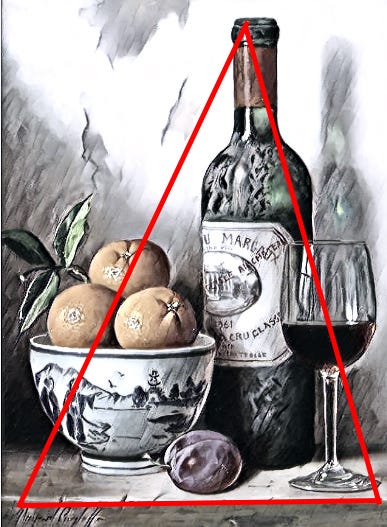
Here is an example of a good composition:
Imagine a still life where you have a bowl of fruit, a bottle and a wine glass. The horizon line is the table’s edge. In your mind's eye draw a line around the three objects to form a triangle shape. The negative or empty space is uses less than half the total surface . The focal point or center of interest (in my example the oranges) are off center.
In “Heat Wave” I had made all three errors I saw so often in student work. 1. Background too large. 2. The focal point was poorly placed. 3.The arrangement did not form that pleasing compositional triangle.
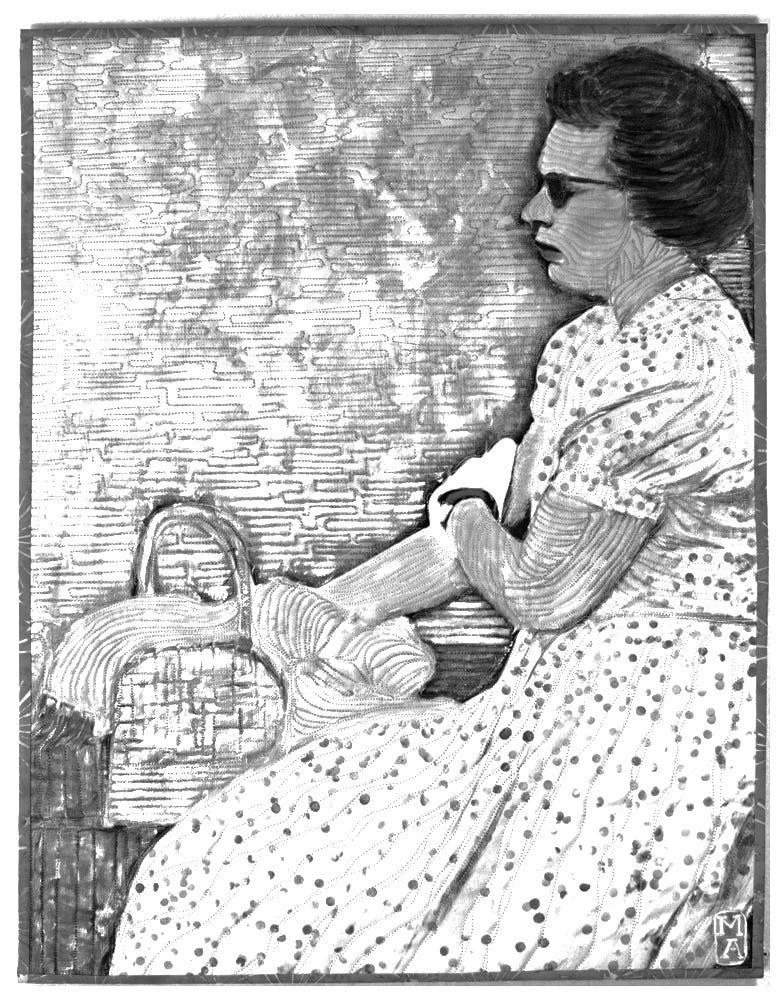
Below is a photograph of the original piece in black and white. (Using a black and white photo helps to focus and eliminate being distracted by color choice) The bright white glove near the center is an unintended focal point. The background including a portion of the park serves no purpose and is visually distracting. The figure does not form the desired triangle
.
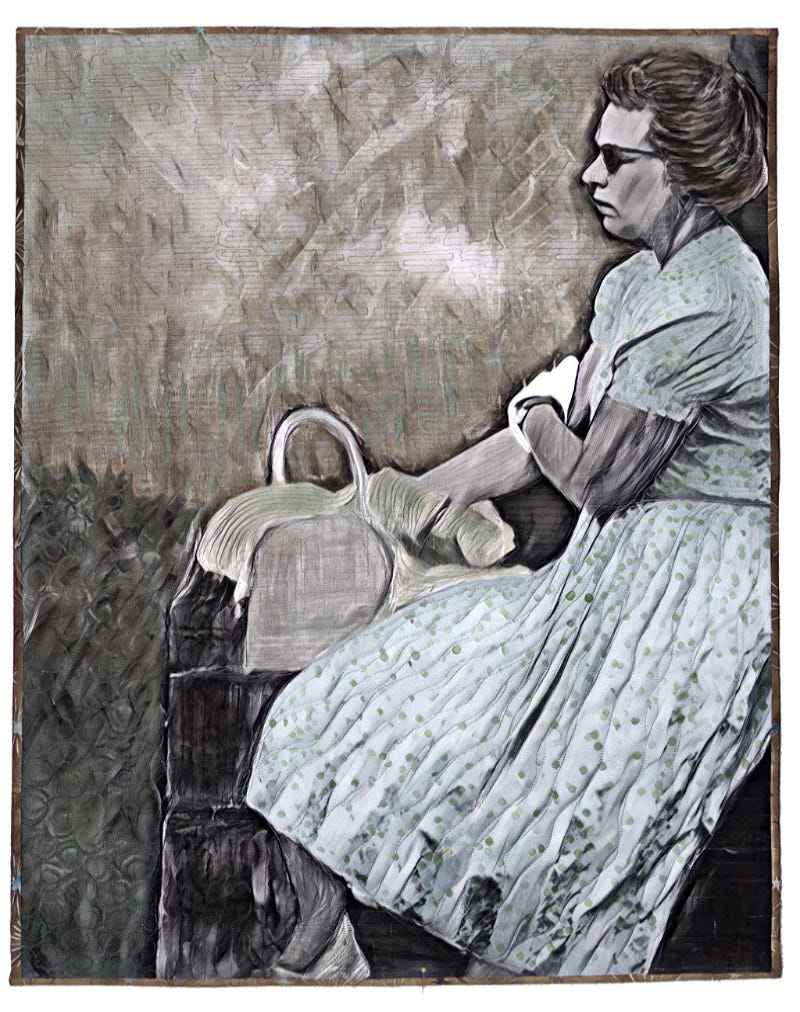
After playing with cropping on my cell phone, I cut almost a quarter of the length from the bottom. This eliminated the dark empty spaces. I cut away almost as much on the left side. The balance between background and foreground was restored. That pleasing triangle was formed with the figure leaning against the wall. The focal point was still an issue which could be addressed by changing color and color value
.
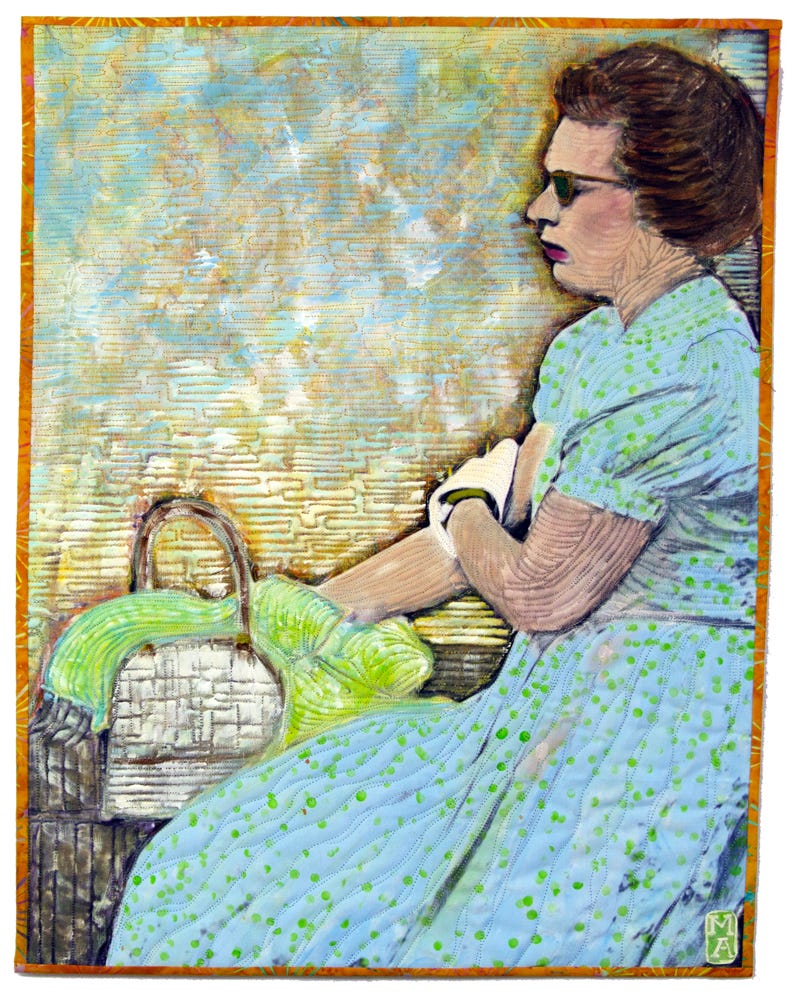
Her skin tone faded into the background because it was dulled by shadow in the reference photograph. The bright spot was a pop of white in her glove became the focal point. So I began by creating some warmth in face and using a unique color: a rosy pink on her lips. Because pink is only used in this one spot and a second unique dark green on the sunglasses, face was established as the center of interest.
I also had to address the problem of the white gloves. One way to balance that white was to add more white and that’s just what I did with her purse. I also added some blue and white to the background to reduce the visual weight of the background. The small changes of color created a line of light values leading to a focal point.

If you compare the two compositions the color values are off. I darkened the hair creating more visual punch. I added subtle blues in the background and brushed white over the wall and added tans which reduced the contrast.
As I uploaded the color comparison above I realized I had an issue with her tangled sweater looped through her hand back. So I hauled in back to studio to fix that issue. I added just a little cream to the glove and changed the colors in her sweater to be a bridge between yellow, green, and blue. I (think!) it’s done.
"The first draft reveals the art; revision reveals the artist." - Michael Lee
I approach my artwork in a similar manner as my writing. The voice in my writer's head is often my father’s. He was a professor of English Literature and used to check my essay before I handed them to a teacher. I can hear him say “Margie, the best writing is rewriting.”
And it seems, I am in the process of rewriting this piece and several others.
Until Next Time…
Margaret
Showing the contrast between the two was really helpful for me… appreciate the explanation.